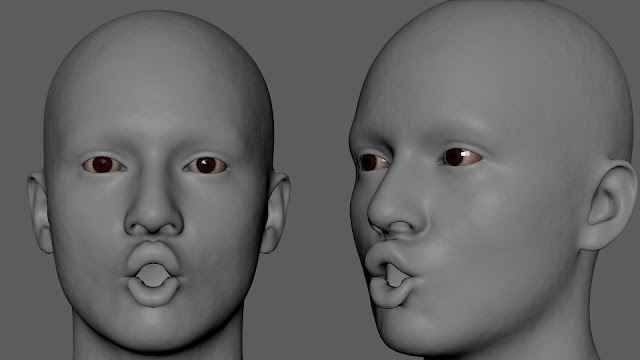
FACS Research Project
We are in the second week of our research project. I'd like to share something extremely cool before we get started. I had the opportunity to talk to Erika Rosenberg last week; she is renowned for being an authority on FACS and has the most in-depth understanding of facials. In addition, she is Paul Ekman's protégé, who wrote the first FACS a manual in 1978. I learned so much in the short thirty-minute interview call that I am at a loss for words. I would want to advise that everyone who is interested in FACS should look her up. She is too knowledgeable on this topic. On my Week 01 research project page, I have enumerated all the resources that I found useful, as well as a specific Erika video that altered my understanding of FACS.
Well, that was interesting. Let's now discuss this week's specifics. To begin with, I'd want to mention that last week taught me a lot and that I now know how to make my AU's and transitions better. I think it was incorrect of me to make one shape at a time last week and finish it before moving on to another. I discovered that, prior to refining or adding more details, I should create every AU that was scheduled for that week and ensure that they blend together.
Since I have selected AU's that complement one another, it is imperative that the mixes work well together. I have stated previously that my objective is to master the transition rather than merely making those AU's appear isolated.
I gave myself three AUs for this week that work well together or complement one another.
- AU 18 - LipPucker
-AU 22 - LipFunnel
-AU 28 - LipSuck
To keep an eye on transitions, I'll start by showing you a video in which I created the foundations for each of the three AU'sand animated it using Maya's shape editor. I would say that my strategy has slightly changed, as I now create the major movement of each AU utilizing the shape editor's edit function and the cluster method. Below, I'll outline the procedures I took and provide a video demonstration.
- Created a base with cluster method.
- Duplicate the deformed mesh and attach that as a blendshape.
- Then, you may easily tweak it with sculpting tools or vertex deformation by utilizing the edit function.
- Prior to making any changes, don't forget to set the slider value to 1.
If you have any questions, this video should answer them.
As I indicated previously, I have modified my methodology. I was able to evaluate and thoroughly analyze the transitions between all the intended AU's by using the above-described procedure. The base and its transition are shown in the video below for every AU.
I was less concerned about the blend going awry before everything lined up after obtaining this. It is very simple to check an AU using this way if something goes wrong with it. Now let's concentrate on AU 18, which is the initial shape.
AU 18 - LipPucker
Orbicularis Oris, the muscle surrounding the mouth, is responsible for this movement. For this AU the edit function in shape editor helped me a lot.
Appearance change due to the AU 18
"1. Pushes the lips of the mouth forward and pulls medially, as if a string attached to the center of the lips were pulling them forward, puckering the mouth.
2. De-elongates the mouth opening, making the mouth opening smaller and rounder, and the lips appear tight.
3. May cause the lips to protrude forwards, but de-elongation may occur without protrusion.
4. Shapes the lips as if the person is pronouncing the vowel oo in the word “fool”.
5. Makes short wrinkles on the skin above the upper lip and also may cause wrinkles on the skin below the lower lip, and wrinkles in the lips themselves.
6. May cause very slight wrinkles or flattening or bulging of the chin boss."
Below attached video shows the base & the movement of this AU.
I sculpted on it and used vertex with soft selection to do a lot of adjustments. I could never really capture everything I did, but it becomes easier if you have a basic grasp of the facial muscles. I'm still in the learning phase, but with every AU I complete, my confidence grows. Furthermore, I think that with enough repetition, it becomes instinctive. After a while, it becomes quite fun & interesting.
Here is the final shape.
AU 22 - LipFunnel

I started by using the pucker as the base for this shape. I utilized the vertex push and pull method to obtain the funnel by duplicating the base pucker that I had created in Shape Editor. I utilized sculpting tools to refine the initial shape after obtaining the basic one.
Appearance change due to AU 22.
"1. Lips funnel outwards taking on the shape as though the person were saying the word flirt.
2. Pulls in medially on the lip corners.
3. Exposes the teeth and may expose gums, often in the lower lip more than the upper.
4. Exposes more of the red parts of the lips as the lips may turn out, often in the lower lip more than the upper."
Here is my base for this AU.
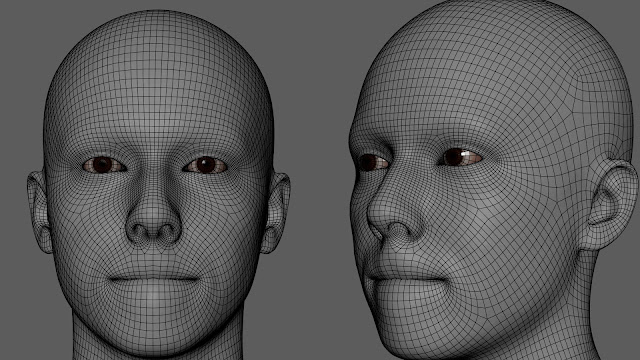
Always observe the behavior of the topology and the implicated muscle's movement. The muscle should guide the topology; this is crucial.
Final shape after refining it.
This AU seems quite hard to pull off, in my opinion. Just getting a solid foundation for it took me a while.
Appearance change due to AU 28.
"1. Sucks the red parts of the lips and adjacent skin into the mouth, covering the teeth.
2. Causes the red parts of the lips to disappear.
3. Stretches the skin above and below the lips as the lips are pulled in.
4. Flattens the chin boss, but the chin boss is not pushed up unless 17 has been added.
5. May cause short wrinkles or bulges to appear at the lip corners."
This is the base I made for it.
I would want to take this opportunity to give some guidance. Although Maya's sculpting tools are great, I would contend that you should definitely use them with a lower brush intensity because Maya model will have less topology than something that is included in ZBrush. This would make the entire modeling process much better. Verify that there are never any errors in any of the AU's in the generated transition animation. Just attempt to run through the animation and make sure it works with every small sculpt or vertex you pull. After focusing on the primary movement sites, it is critical to consider skin sliding and where or how much it can affect the surrounding area due to created stretching.
My final shape for this AU.
I have completed the AUs for this week. You may view the movie below, in which I have animated every AU I have made this week and the week before.
I'll get to work on the AU's that are scheduled for next week and post an update on this blog to discuss my experiences.
 I started by using the pucker as the base for this shape. I utilized the vertex push and pull method to obtain the funnel by duplicating the base pucker that I had created in Shape Editor. I utilized sculpting tools to refine the initial shape after obtaining the basic one.


No comments:
Post a Comment