FACS Research Project

 FACS Research Project

        Understanding the subtleties of a human face and producing hyperrealistic portraits have always piqued my curiosity. I became interested in portraiture after seeing Kris Costa's work and being in awe of it. I was motivated by him to begin working on my first portrait of Keanu Reeves. Even though it turned out awful, I was still rather pleased with my development at the time and continued honing the abilities that have brought me to this point. Even though I still have a lot to work on, I'm rather pleased with my development. That was a little introduction to me, now let's go on to FACS.

        Originally created by Carl-Herman Hjortsjö with 23 facial motion units in 1970, it was subsequently developed further by Paul Ekman, and Wallace Friesen, the FACS (Facial Action Coding System) method to interpret facial micro expressions. Originally designed to study faces, it was eventually applied to the fields of animation, games, and visual effects to create realistic expressions. It was first brought to me as an upskill training while I was employed at MPC Films. That was a turning point in my life because it showed me that if I create a face, I can do so much more with it. I made the decision to specialize in FACS after leaving MPC and to start making content for my reel. It took me about a month to make, but throughout that time I learned a lot. 

       Since I want to work with faces, I decided to do a research project on FACS. Not simply in terms of technical knowledge, but also in terms of comprehending the anatomical processes that lead to that expression, there is much to learn. I made the error of concentrating on making every conceivable shape when I was first producing my demo reel for FACS. I was advised to concentrate solely on the important forms and how they transition into one another by industry professionals after exchanging ideas and receiving a ton of guidance. I can't emphasize enough how important the transition part is. It is incredibly vital. However, understanding this requires knowledge of facial anatomy, and I have already suggested a book for that.  I would personally stress on getting the facial muscles down before starting FACS. Its action with its point of origin and contact.

        Every shape in FACS is assigned an AU, or action unit. I'll be referring to each shape as an AU going forward. I made note of every AU on my agenda that I will be concentrating on for this assignment. It will be my pleasure to discuss this, one of my largest/biggest assignment at FIEA, in more detail below for those who are curious. 

These books/websites are highly recommended if you desire a thorough understanding of FACS:-

FACS Manual by Paul Ekman(Must Have)

Anatomy of Facial Expressions

FACS Reference by Melinda

ARKIT Blendshapes

FACS overview by Erika Rosenberg

Some Artist that I follow:- Sefki Ibrahim , Kris Costa , Ian Spriggs. There are many artists who I admire and find inspiration in, but these are the main ones.

ADVICE & TIPS FROM INDUSTRY PROFESSIONALS

    I got a chance to talk to a lot of industry professionals as a part of research project last semester, with whom I am still contact in with. I will list down all the major advice & tips I got from them.

* Identify relevant muscles

* Appearance changes

* Don't isolate AU's

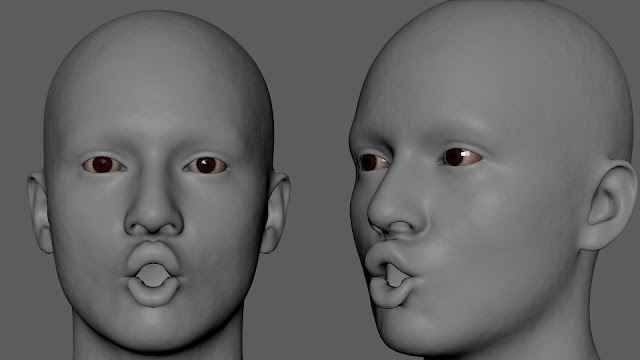
* Focus on transitions

* Skin should follow the muscle

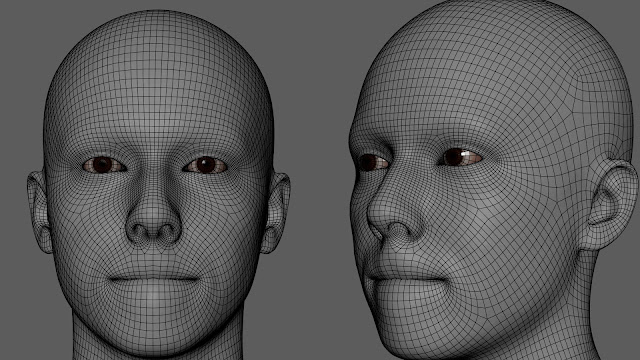
* Wireframe is really important.

* A suitable topology is vital.

* Pay attention to lip thickness and how it relates to teeth.

* Study the anatomy & plane of the face.

* Think about which muscles create each shape and how they influence the skin.

* Observe how the thinner skin slides over the bone and how thicker skin or areas of fatty tissue move a little differently.

* Slow motion videos are a game changer.

My schedule for this assignment

Week 01

       This assignment week ran from June 11–June 17, 2024, for the first week. For this week I will be working on four AU's.

AU 12 - lipCornerPuller

AU 14 - lipdimpler

AU 15 - lipCornerDepressor

AU 20 - lipStretcher

        I started with a few alternatives for the foundation mesh. After utilizing Metahuman for a while,  still I was unable to locate a guide texture for it. Despite this, I was able to get around it and discovered that 3D scan store mesh and Wrap3d Mesh could help. I chose the 3D scan store mesh, even though the other one was really decent. I think a guiding texture would be very helpful to me in understanding where the nasolabial fold, infraorbital furrow, and other structures sit when they move. The 3D scan store mesh is on the right, while the Wrap 3D mesh is on the left. I've included a small amount of color saturation editing to the 3D scan shop texture guide. In addition, I utilized fractal as the normal map to make skin sliding more noticeable.

3D Scan Store Mesh

        To grasp things better, I wanted to start from beginning with everything. To obtain my basic shape, I decided to use clusters and paint weights. First up on the list is AU 12.

AU 12 - LipCornerPuller

        This is what AU12 looks like. The major muscle involved here is Zygomaticus Major.


        "The muscle underlying AU 12 emerges high up in the lower face by the cheek bones and attaches at the corner of the lips. In AU 12, the direction of the action is to pull the lip corners up towards the cheek bone in an oblique direction.

Appearance changes due to AU 12

1. Pulls the corners of the lips back and upward (obliquely) creating a shape to the mouth.

2. Deepens the nasolabial furrow, pulling it laterally and up. The skin adjacent to the nasolabial furrow is raised up and

laterally.

3. In a weak to moderate 12, there is some raising of the infraorbital triangle and there may be some deepening of the

infraorbital furrow.

4. In a strong action, one or more of the following:

a. The infraorbital triangle push upwards is more evident.

b. The infraorbital furrow deepening is more evident.

c. Bags the skin below the lower eyelid.

d. Narrows the eye aperture by pushing up the cheek and skin below the lower lid.

e. Produces crow's feet at eye corners.

f. May raise and widen the nostrils.

g. May flatten and stretch the skin on the chin boss."

      - Taken from FACS Manual

        To get started, I placed a cluster on the face and skinned it to the lip corners. This is an iterative process, and it requires going back and forth. First, in the video below, I'll demonstrate how I make clusters and paint them. It is critical that you grasp this procedure because I will be using it extensively during this project.

1. I'm constructing a cluster by going to Deform > Cluster.

2. After you do so, the paint value of 1 represents the entire object's value. However, in this instance, we just need to paint the nostrils, and only the nostrils will be impacted by moving the cluster.

3. In order to achieve that, I first experimented with different display values to increase the visibility of such changes. Depending on your preferences, you should experiment and find what works best for your visibility.

4. After that, I set the cluster's weight to zero and removed all of its weight. Nothing will be impacted by the cluster now. 

5. After choosing Add, I begin painting with a soft brush and 1 value. Painting it in a circular motion, in my opinion, will give it a more natural flow and nicer fall off.

6. After that, I simply click the smooth button a few times to create a seamless transition.

7. To confirm that everything is functioning properly and that I keyed the cluster itself in the correct manner.

8. To improve the appearance of the transition, I then return to painting mode and make the required adjustments.

        I plan to use this procedure to establish the foundation for the majority of the AUs. I think it provides a perfect base, so give skin painting a try. It's not the only approach, but in my experience, it works the best.


        One is never enough, so I made a few more clusters to push and pull things around. You should create as many as you like. I would suggest getting as close as possible to the final shape.


          After obtaining a solid foundation, as indicated below, I attached this shape as blendshape and after duplicating it I flipped it to the right side.


       I started tidying up, consulting the other two books I mentioned before, as well as Malinda's website. There is enough topology in this mesh to make advantage of Maya's sculpting capabilities. I started using sculpting tools to sculpt and acquire the desired form using the edit function in the blendshape Editor. Focusing on skin slide is also very crucial; you can achieve this by holding down the CTRL + SHIFT + translating keys. Understanding changes in the skin's appearance, such as bulges, flattening, elongation, etc., is crucial, and the FACS manual does a great job of simplifying things.


        After a couple of hours I was able to achieve my first shape i.e. AU 12.


AU 14 - LipDimpler

        Next up is lipDimpler. The process remains the same, but the only thing that changes here is the shape and muscle involved. Buccinator is the prime muscle involved here.


        The muscle underlying AU 14 emerges far back in the cheek bones and attaches in the center portion of the lips. In AU 14 the skin beyond the lip corners is pulled inwards towards the lip corners, which are themselves drawn somewhat towards the ears. This shape tightens the lip corners.

        Appearance changes due to AU 14.

"1. Tightens the corners of the mouth, pulling the corners somewhat inwards, and narrowing the lip corners.

2. Produces wrinkles and/or a bulge at the lip corner.

3. May cause a dimple-like wrinkle beyond the lip corner.

4. Lip corners usually angle up but they could be angled down or just straight.

5. Lips stretch lateral to a limited extent and flatten.

6. May deepen the nasolabial furrow.

7. Pulls the skin below the lip corners and the chin boss up towards the lip corners, flattening and stretching the chin

boss skin.

8. May cause a short bulge or wrinkle at the lip corners which extends the line between the lips down towards the chin;

this change may give the corners of the lips a downward cast."

        Got a good base shape using cluster method.


        Attached it as a blendshape and flipped it.


        Started cleaning things up using sculpting tools and references. Here is the final shape.


        AU 15 - LipCornerDepressor

        This is what it looks like.

        Appearance changes due to AU 15

"1. Pulls the corners of the lips down.

2. Changes the shape of the lips so they are angled down at the corner, and usually the lower lip is somewhat stretched horizontally.

3. Produces some pouching, bagging, or wrinkling of skin below the lip corners, which may not be apparent unless the action is strong.

4. May flatten or cause bulges to appear on the chin boss, may produce a depression medially under the lower lip.

5. If the nasolabial furrow is permanently etched, it deepens in the lower portion and may appear pulled down or lengthened."
        
       Same thing again, push & pull the clusters to get a base. Once more, make whichever many clusters you desire. Having well-defined basis shapes greatly facilitates the sculpting process. The Depressor Anguli Oris is the main muscle at play here.


        Duplicate the shape and flipped.


        Clean up process and here is the final.


   AU 20 - LipStretcher

       The muscle underlying AU 20 emerges near the back of the jaw (ramus of the mandible) and attaches to the lip corner. The action of AU 20 pulls the lips laterally, back towards the ears. When the action of 20 is strong, the platysma (AU 21) is usually recruited, evidenced by the tightening or bulging in the neck. There are two mucles involved here, Risorius & Platysma.

        This is what it looks like.

        Appearance changes due to AU 20.

"1. Pulls the lips back laterally; the lip corners may be raised or lowered to a limited extent but the main movement is horizontal.

2. Elongates the mouth.

3. The lips become flattened and stretched by the lateral pull.

4. Pulls the skin beyond the lip corners laterally, so that the cheek area adjacent to the lip corner becomes flattened.

5. Wrinkles may appear at the lip corners or beyond the lip corners part way back towards the ears; the shape of these wrinkles is not important in distinguishing 20 from other AUs, but their presence due to the lateral pull on the skin is noteworthy.

6. Pulls the lower portion of the nasolabial furrow, and pulls the skin in the lower nasolabial furrow area laterally.

7. Stretches the skin over the chin boss laterally. May cause the chin to appear flattened and/or wrinkled.

8. Can stretch nostril wings laterally to elongate the nostril's opening."

        Cluster base mesh.

        
        Duplicating & flipped

        
        Cleaned up & Final


        All the shapes are done for this week as planned. Below I will attach videos that shows transition between each shape. Will add more updates with coming weeks.


 FACS Research Project 

Week 02

        We are in the second week of our research project. I'd like to share something extremely cool before we get started. I had the opportunity to talk to Erika Rosenberg last week; she is renowned for being an authority on FACS and has the most in-depth understanding of facials. In addition, she is Paul Ekman's protégé, who wrote the first FACS a manual in 1978. I learned so much in the short thirty-minute interview call that I am at a loss for words. I would want to advise that everyone who is interested in FACS should look her up. She is too knowledgeable on this topic. Above in the Week 01 intro, I have enumerated all the resources that I found useful, as well as a specific Erika video that altered my understanding of FACS.

        Well, that was interesting. Let's now discuss this week's specifics. To begin with, I'd want to mention that last week taught me a lot and that I now know how to make my AU's and transitions better. I think it was incorrect of me to make one shape at a time last week and finish it before moving on to another. I discovered that, prior to refining or adding more details, I should create every AU that was scheduled for that week and ensure that they blend together. 

        Since I have selected AU's that complement one another, it is imperative that the mixes work well together. I have stated previously that my objective is to master the transition rather than merely making those AU's appear isolated.

        I gave myself three AUs for this week that work well together or complement one another.  

        - AU 18 - LipPucker

        -AU 22 - LipFunnel

        -AU 28 - LipSuck

        To keep an eye on transitions, I'll start by showing you a video in which I created the foundations for each of the three AU'sand animated it using Maya's shape editor. I would say that my strategy has slightly changed, as I now create the major movement of each AU utilizing the shape editor's edit function and the cluster method. Below, I'll outline the procedures I took and provide a video demonstration.

        - Created a base with cluster method.

        - Duplicate the deformed mesh and attach that as a blendshape.

        - Then, you may easily tweak it with sculpting tools or vertex deformation by utilizing the edit function.

        - Prior to making any changes, don't forget to set the slider value to 1.

       If you have any questions, this video should answer them.


        As I indicated previously, I have modified my methodology. I was able to evaluate and thoroughly analyze the transitions between all the intended AU's by using the above-described procedure. The base and its transition are shown in the video below for every AU.


        I was less concerned about the blend going awry before everything lined up after obtaining this. It is very simple to check an AU using this way if something goes wrong with it. Now let's concentrate on AU 18, which is the initial shape.

AU 18 - LipPucker

        Orbicularis Oris, the muscle surrounding the mouth, is responsible for this movement. For this AU the edit function in shape editor helped me a lot. 

        Appearance change due to the AU 18

"1. Pushes the lips of the mouth forward and pulls medially, as if a string attached to the center of the lips were pulling them forward, puckering the mouth.

2. De-elongates the mouth opening, making the mouth opening smaller and rounder, and the lips appear tight.

3. May cause the lips to protrude forwards, but de-elongation may occur without protrusion.

4. Shapes the lips as if the person is pronouncing the vowel oo in the word “fool”.

5. Makes short wrinkles on the skin above the upper lip and also may cause wrinkles on the skin below the lower lip, and wrinkles in the lips themselves.

6. May cause very slight wrinkles or flattening or bulging of the chin boss."

        Below attached video shows the base & the movement of this AU.


        I sculpted on it and used vertex with soft selection to do a lot of adjustments. I could never really capture everything I did, but it becomes easier if you have a basic grasp of the facial muscles. I'm still in the learning phase, but with every AU I complete, my confidence grows. Furthermore, I think that with enough repetition, it becomes instinctive. After a while, it becomes quite fun & interesting.

        Here is the final shape.


 AU 22 - LipFunnel

 I started by using the pucker as the base for this shape. I utilized the vertex push and pull method to obtain the funnel by duplicating the base pucker that I had created in Shape Editor. I utilized sculpting tools to refine the initial shape after obtaining the basic one.

        Appearance change due to AU 22.

"1. Lips funnel outwards taking on the shape as though the person were saying the word flirt.

2. Pulls in medially on the lip corners.

3. Exposes the teeth and may expose gums, often in the lower lip more than the upper.

4. Exposes more of the red parts of the lips as the lips may turn out, often in the lower lip more than the upper."

        Here is my base for this AU.


        Always observe the behavior of the topology and the implicated muscle's movement. The muscle should guide the topology; this is crucial.

        Final shape after refining it.


AU 28 - LipSuck


        This AU seems quite hard to pull off, in my opinion. Just getting a solid foundation for it took me a while.

        Appearance change due to AU 28.

"1. Sucks the red parts of the lips and adjacent skin into the mouth, covering the teeth.

2. Causes the red parts of the lips to disappear.

3. Stretches the skin above and below the lips as the lips are pulled in.

4. Flattens the chin boss, but the chin boss is not pushed up unless 17 has been added.

5. May cause short wrinkles or bulges to appear at the lip corners."

        This is the base I made for it.


        I would want to take this opportunity to give some guidance. Although Maya's sculpting tools are great, I would contend that you should definitely use them with a lower brush intensity because Maya model will have less topology than something that is included in ZBrush. This would make the entire modeling process much better. Verify that there are never any errors in any of the AU's in the generated transition animation. Just attempt to run through the animation and make sure it works with every small sculpt or vertex you pull. After focusing on the primary movement sites, it is critical to consider skin sliding and where or how much it can affect the surrounding area due to created stretching.

        My final shape for this AU.


        I have completed the AUs for this week. You may view the movie below, in which I have animated every AU I have made this week and the week before.


        I'll get to work on the AU's that are scheduled for next week and post an update on this blog to discuss my experiences.

FACS Research Project 

Week 03

        Working with brow AUs is one of my favorite facial sections to work with, so this week was enjoyable. Recently, I received some exciting news: the FACS CD I requested, containing all the content and videos, was finally sent to me by my university, UCF, where I am currently earning my master's degree. It contains so much information that I'm at a loss for words. It's fantastic to have access to the FACS manual as soon as feasible for someone who is new to FACS, as I've already noted.

        As I previously stated, my primary focus with this week was brow AUs. I started with a pretty nice beginning point by using the same process where I made fresh clusters for my eyebrows. I'll make an effort to list every major cluster I created and list down all the AU's I worked on.

        - AU 1 &2 - BrowRaise

        -AU 4 - BrowLower

        -AU 9 - NoseWrinkler

        Additionally, I was planning to do procerus, which causes the eyebrows to droop rigidly and results in horizontal creases on the base of the nose. I decided against it since I could obtain a comparable effect through AU 9.

AU 1 & 2 - BrowRaiseer


        It combines two AUs, identified as 1 and 2, which stand for inner and outer brow raises, respectively. One piece of advice I received from industry veterans is to push those wrinkles farther than they should. I received the same criticism from Nick Zuccarello, my art instructor. With that in mind, I began by making eyebrow clusters to aid in the creation of all the AU's I have scheduled for this week.

        Appearance changes due to these AU's

AU1 - innerBrowRaise

"1. Pulls the inner portion of the eyebrows upwards.

2. For many people, produces an oblique to the eyebrows.

3. Causes the skin in the center of the forehead to wrinkle horizontally. These wrinkles usually do not run across the entire forehead, but are limited to the center. The wrinkles may be curved, raised more in the center than at the ends, rather than horizontal. These wrinkles may not appear in infants or children. If there are permanently etched lines or wrinkles in the central area of the forehead, they deepen.

AU2 - outerBrowRaise

4. Pulls the lateral (outer) portion of the eyebrows upwards.

5. Produces an arched shape to the eyebrows.

6. Causes the lateral portion of the eye cover fold to be stretched upwards.

7. In some people, causes short horizontal wrinkles to appear above the lateral portions of the eyebrows. There may also be wrinkles produced in the medial portion of the forehead, but they are not as deep as the lateral ones."

        Let me just say that, although it may seem like a laborious task at first, building and painting clusters is actually a great place to start. That's not the only option, though; vertices alone can also be used to build a base. Depending on the AU I'm attempting to construct, I may utilize clusters or vertices at different points.


I was able to create the base I needed by creating these clusters, which is seen below.

    
        Using the shape editor's edit tool, I was able to obtain my desired outcome after attaching the base as a blend shape. I created all the three AU's using clusters and an animation to see how the transition functions before settling on a single specific form.

        This is my final result for this AU.


AU 4 - BrowLowerer


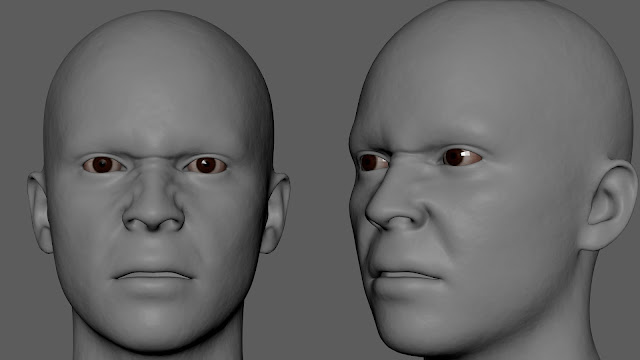
        In order to create a base for this AU I basically used the same clusters I created before. This brow action pulls the eyebrow towards each other and also down at the same time. I'll list down the appearance change below.

        Appearance change due to AU 4

"1. Lowers the eyebrow. In different instances it may be only the inner portion of the eyebrow that is lowered or it may be both inner and central portions that are lowered, or it may appear that the entire eyebrow is lowered.

2. Pushes the eye cover fold downwards and may narrow the eye aperture.

3. Pulls the eyebrows closer together.

4. Produces vertical wrinkles between the eyebrows, which may be deep. In some people the wrinkles between the eyebrows may not be vertical but at a 45 degree angle, or both angled and vertical. May also produce one or more horizontal wrinkles at the root of the nose. If the vertical, angled, or horizontal wrinkles are permanently etched, they deepen.

5. May produce an oblique wrinkle or muscle bulge running from the middle of the forehead above the middle of the eyebrow down to the inner corner of the brow, or a series of rippling bulges above and medial to the eyebrow center."

        I was able to create a useful base upon which to add details by using the clusters.

    
        From this point on, things were really easy. All I needed to do was consult the manual, identify the muscle involved and repeatedly see the animation to make sure everything was functioning as it should. I was able to achieve the desired outcome for this AU by combining extensive sculpting and vertex positioning.


AU 9 - NoseWrinkler


        The nose wrinkler, AU 9, is the next in line. As I already indicated, since AU 9 provides a similar movement, I decided not to create Procerus. I had to start by making more clusters in order to assist me establish a solid base. 


        Since I knew it would be much simpler for me to utilize the edit function in conjunction with vertex pulling, I didn't make any clusters for the nose. One thing to keep in mind in this situation is that things tend to fall into place after you grasp what the AU does and the easiest way to get a particular outcome.

        Appearance change due to AU 9

"1. Pulls the skin along the sides of the nose upwards towards the root of the nose causing wrinkles to appear along the sides of the nose and across the root of the nose.

2. Pulls the infraorbital triangle upwards, causing the infraorbital furrow to wrinkle (or, if it is permanently etched, to deepen), and bunching or bagging of the skin around the lower eyelid.

3. Lowers the medial portion of the eyebrows, which tends to conceal any raising of the inner corners of the brow if AU 1 were to act.

4. Narrows the eye aperture due to the actions described in appearance changes 2 and 3.

5. Pulls the center of the upper lip upwards. If the action is strong, the lips part, otherwise the lips may remain closed.

6. May widen and raise the nostril wings.

7. May deepen the nasolabial furrow if the action is strong."

        Base created using clusters.


        I got some basic movement in, and now it was time to check all the affected areas where there could be skin stretching, pulling, sliding and all that good stuff. I tried to exaggerate several of those wrinkles, as advised.

        My final result for this AU.


        All of the AUs for this week have been completed. I'll post some animations I created for these three AUs and the combination of all the AU's I have up to this point to see how they function together.


        This project will wrap up next week. I intend to create a bunch of AUs for the eyes and jaw. I'll put my latest update and experience here for anyone who is interested.

FACS Research Project 

Week 04

        This is the project's final week. It was a fantastic assignment, and the research component aided and altered my viewpoint on how I perceive these shapes. I was able to produce a large number of AUs this week. I'll break everything down, but first I'd like to address the criticism I received on my AUs.

        I was advised to push the AU's further, and some shapes, such as the funneler and puckerer, need more negative space, with which I completely agree. The movement itself is more intricate than I was able to do. One of the feedback suggestions was to have more falloffs and skin slides. I will work on all of these feedbacks once I have completed all the AUs and submitted the assignment, which is due today.

        This week I was able to create the following AU's

        AU 10 - UpperLipRaiser

        AU 11 - NasalabialFurrowDeepner

        AU 27 - JawStretch

        Also the the eye movement & eye close shape.

AU 10 - UpperLipRaiser

        Appearance change due to this AU.

"1. Raises the upper lip. Center of upper lip is drawn straight up, the outer portions of upper lip are drawn up but not as high as the center.

2. Causes an angular bend in the shape of the upper lip.

3. Pushes the infraorbital triangle up, and may cause the infraorbital furrow to wrinkle, or deepen if already evident in neutral..

4. Widens and raises the nostril wings.

5. When the action is strong, the lips part."

       I used the cluster method to get a base which I will attach below.


        Below is the test animation for this AU


        After completing the form, I tested it in conjunction with AU 12 (lipCornerPuller). That animation is seen below.


        Here is the final shape


AU 11 - NasalabialFurrowDeepner

        Appearance change due to this AU.

"1. Pulls the upper lip upward and laterally to a small extent at the midpoint between the philtrum and outer lip corners.

2. Pulls the skin below the upper portion of the nasolabial furrow obliquely upwards.

3. Deepens the upper middle portion of the nasolabial furrow.

4. Raises and puffs the upper medial portion of the infraorbital triangle faintly.

5. In a strong action it may deepen the upper medial portion of the infraorbital furrow."

        For this AU, I did not develop any unique clusters; instead, I replicated the AU 10 shape in the Blendshape editor and sculpted and altered it there. AU 10 and 11 were a little perplexing to me since, at some level, they both apply pressure on the nasalabial fold, but the difference, I discovered, is the curvature of the nasalabial. AU 11 goes deep in the fold's medial section, whereas Au 10 affects more to its upper portion.

        Final Shape


        I did not include the color version as the change was not clearly visible.

AU 27 - JawStretch


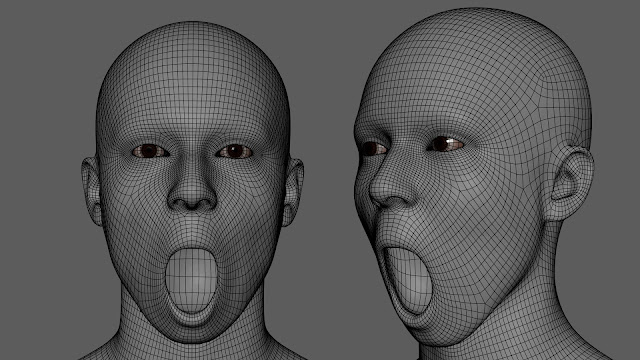
        This AU is incredibly complex because there is so much happening on at once. It's not just a muscle here; the entire mandible is moving, as is the skin and muscles. Rather than just starting, I watched a number of videos of jaw movement on YouTube. Sculpting became easier after I had a general understanding of it.

        Appearacance changes due to this AU.

"1. The mandible is pulled down.

2. Can open the mouth quite far as the mandible is pulled down, changing the shape of the mouth opening from an oval with the long axis in the horizontal plane to one in the vertical direction.

3. Mouth does not appear as if it has fallen open but as if it is actively pulled down forcibly or stretched open widely.

4. The lips may be stretched vertically by the extent of the opening of the mouth.

5. Flattens and stretches cheeks.

6. Changes shape of skin on the chin boss and the appearance under the chin."

        I made some clusters for it.


        Test animation


        I would definitely recommend giving this AU more time than normal because it is a difficult form that takes more attention. My final shape does not feel complete yet, and I will continue to work on it and improve it.


Eye Shapes

        I created following eye shapes.

        - eyeLook Up/Down

        - eyeLook Left/Right

        - eyeClose

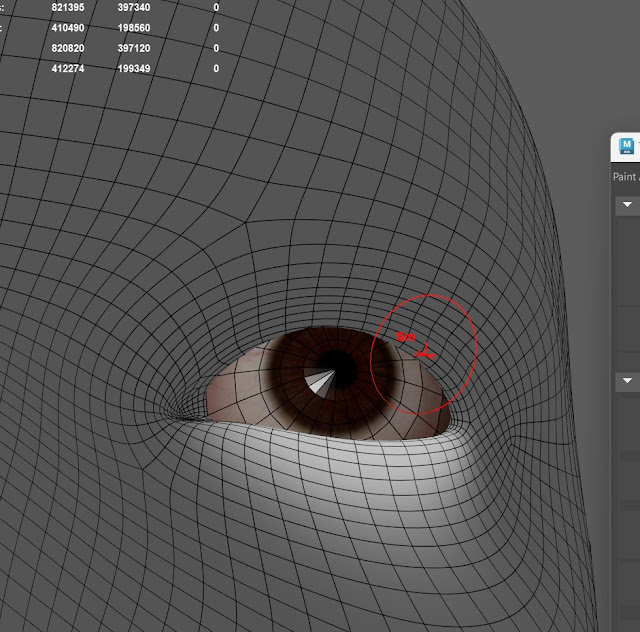
        The following are the clusters I made for these AUs.


        Some test animations
        
        Basic eye motion


        Eye motion with lids


        Eye roll animation


        Base for eye close


Eye close is another intricate shape. If you look attentively, the lids don't simply go up and down. When descending down, the upper lid pulls somewhat inward, and when coming up, the lower lid gets pulled towards the eye cavity. For this shape as well, I watched a lot of slow motion footage on YouTube.

        Here is the final animation for all this weeks AU's.


The following animation comprises all of the AUs that I intended to develop for this project. Again, I plan to devote more time to the project and enhance it based on the comments I've received. However, this research project and assignment have officially come to an end. It was enjoyable to share my experience here for anyone who is interested.


Comments